Friday 29 October 2010

Rock work Testing

Over the past week I have been testing different techniques in hope of finding one that represents the rock types of Palau well.


But first i completed my sketch model.


It was very hard to make the to materials look like they were attached rather than seperate, and I think when I create the real models rock work I will make the two contrasting types out of the same material.
It also showed me the need to watch the rock attached to the walkway so that it doesn't restrict the walking space to much.

I first tested blue and yellow foams on there own to see if I could sculpt good rock work out of either.


Blue foam was easy to carve into but it was extremely hard to create detail which will be necessary as to represent the scale. The texture also did not match that of convincing rock.


Yellow was a lot better but still had the same problems just lessened by the foams denser nature.

I then went on to experiment with milliput on top of the foams surface here are my two results.


I prefer the second attempt I used foil to create a texture then used the lines to create cracks, this affect seems to suggest scale also. I didn't have as much control as I would have liked when pressing the foil probably due to the thinness of the foil, so next time i will try using the thickest foil I can find.

I then went to try and create a realistic coral reef rock structure.
From a previous project I knew spraying foam with spray paint would cause the blue foam to melt and create a texture.


This was the result, although an interesting affect it didn't to me represent the scale well and the paint formed an odd spider web pattern which didn't look like the texture I was after.

I wanted to try sandblasting milliput so I created a texture with the milliput that I thought would work when sand blasting. 


The milliput was fully hardened when I attempted to sand blast a texture into the surface. This took a long time to achieve,  but I really liked texture it created but the sand blasting didn't eat away as much as I though it would.

With this in mind I attempted to create a more already textured milliput surface to then sand blast.


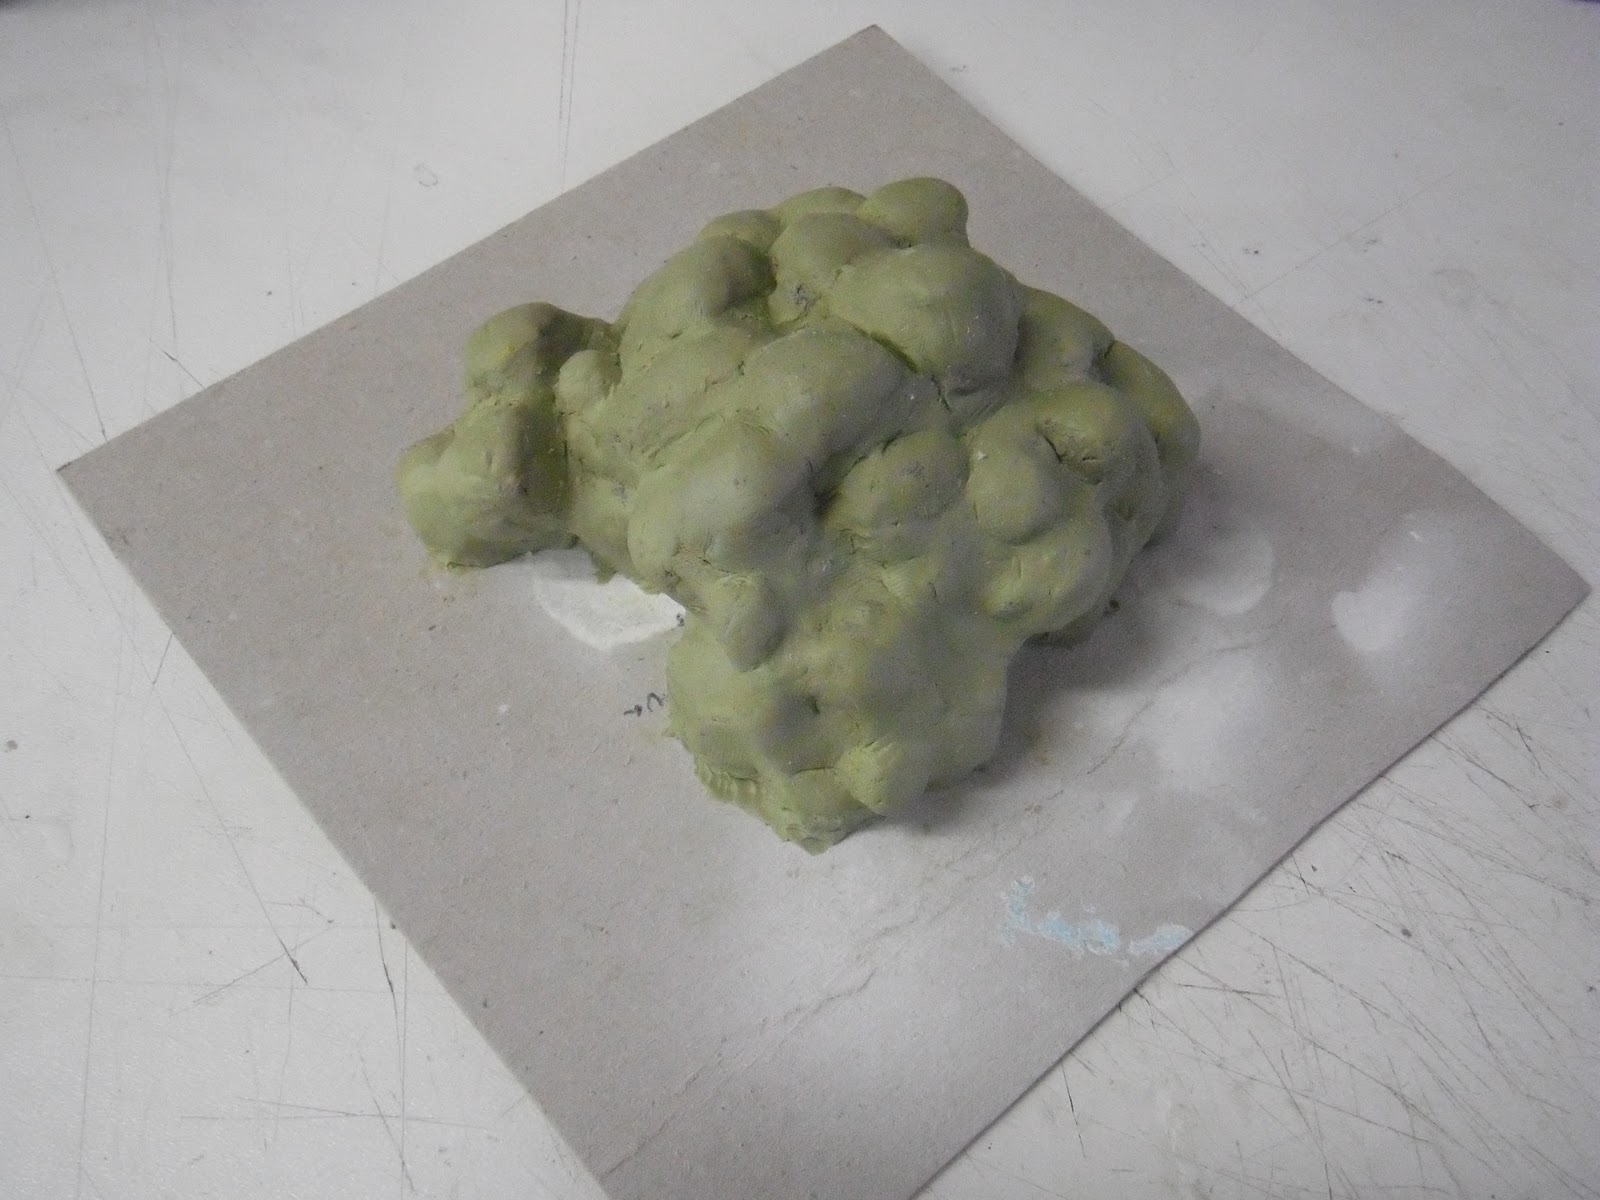
I created a very textured surface in yellow foam then covered this in milliput, as you can see the milliput smoothed the surface and created a blobby affect, next time I will create an even more oddly textured shape before covering in milliput.

My last test this week was to try sand blasting the milliput while it was still soft.


The affect was far easier to achieve and looked a lot better, this texture may also be suitable for scaled brain corals and plate corals.

To do:
Continue research (start corals research)
Complete structure/ architecture
Finalise rock work techniques, and start build
Finish inside of top tanks
Laser cut top tank idea
Order Scale link plants

Sunday 24 October 2010

Tubing complete

From my last post I have started to clad the model in styrene and the acrylic tube has been cut and sand to make the underwater walkway.


The acrylic tubing looks very affective and fits well however there are a few gaps. These gaps are at the base of the tubing at the joints and will be covered up by a styrene wall that I had already planned to add.

I have also started a small sketch model for the rock work stage to see how it will fit and look.


This is a very small model but has helped me to identify areas of concern for example some gaps a way to small on this model and that the base of the rock work will need to be sculpted carefully to look realistic. This model is missing the top part of the rock work (less eroded part).

Jobs to do

- Construct back of walls
- Consolidate idea for top tanks
- Continue Research on rock work
- Add styrene to all areas necessary
- Finish sketch Model

Sunday 17 October 2010

Phase 1 Construction Complete

All walls are now constructed, a bit of adjustment is needed to get them fitting but other than that I can start preparing for the rock work stage.


I will proceed by adding styrene to the base and walkway as these will adjust the shape of the rock work,
and I still need to sand the acrylic tube to the correct size once this is done the left wall can be stuck together.

I'm happy with my progress and happy with my model at this stage, though more important stages and more testing processes are ahead in this project I'm confident that the result will be impressive.

I am lacking in research especially for the rock work stage, which is looming so this will be my priority for the coming week.

To do :
- Research (rock work)
- Sand Acrylic tube to correct sizes
- Cut out necessary pieces of styrene (walkway, base, top left hand corner)
- Sand semi-circle and clad so tube fits
- Complete left wall (stick together, add support for walkway)
- Decide on two top tanks themes (email David again)
- Cut yellow foam to correct sizes and shape

Tuesday 12 October 2010

Slow Progress

Since my last post progress hasn't been as quick as I would have liked, due to inductions in the workshop which restrict me from using many machines that I need.

However I have managed to start the build here is an image of what I've accomplished so far (in terms of the physical model).


As you can see I have two walls constructed and the base has been cutout and marked. I have also cut three bits of acrylic tube out ready to be shaped. The only challenge I have is to make the left wall taller as it is 3mm to small due to the way it was constructed using a circular saw. I plan to cut a small bit of MDF and stick it on top, this sounds untidy but all will be hidden in the finishing stage once it is clad with styrene.

The piece of yellow foam is a test sample, I have never used this type of foam before and wanted to know what effects I could produce to make realistic looking rock work.


This was produced by carving out rock shapes from a block then sand blasting. I really like the weathered effect it has produced and am considering using the same technique for the rock work on my model below water level. I think I will sand blast further away from the foam next time to give me more control over the final result.

I have organised what my research should involve in the first few pages and designed the layout and done the first page:

Jobs to do: -

Continue Research Folder

Continue Model Construction
- Left Wall
- Walkway
- Acrylic Tubing
- More tested rock work samples

Tuesday 5 October 2010

Start of the Project

Welcome to my blog,
                                  The purpose of this blog is for me to document my progress through my third year model making project entitled External Brief.
The project was to acquire a brief from an existing model making company and then create their design in the 10 weeks leading up to christmas (the start of my final year).

Over summer I acquired a brief from Lazenby Design Associates, a zoo, aquarium and museum designer, who I also worked for over the two and a half months of summer.

The designing of my project involved several meetings between David Lazenby and I, where the project was discussed and from this I produced sketch models of designs.

I am now at the point where I'm back at University and the design has been finalised but some areas will later be discussed with my client to ensure that the model meets industry standard and Lazenby Designs specialist requirements.

Here is the design : Palau Aquarium


This will be a 1:50 scale model this is the main architectural construction, but the physical model I build will include scale people, rock work, corals, exhibit boards, side tanks, vegetation and hopefully lighting. The environment of the tank will be that of Palau a series of islands in the pacific.


David Lazenby has created a model based on Palau :


This gives me an idea of what he expects.


So far i have some research on corals and palau but nothing structured.


Jobs to do:
Organise Research, what do I need to research?
Build basic structure?
Produce designs for the wall tanks to be discussed with David


Pictures of my work will be uploaded hopefully daily as I work hard to complete this project efficiently and to the best of my ability